Today's Class- Two of the conversations we had today were about potential use of color in woodcuts, and black line/white line approaches to woodcut. I'll show examples of both here.
Black Line Vs White Line- In a standard black and white woodcut every thing in the image is either black (ink) or white (paper), although optical gray tones can be achieved by mark mixing. When we think of line, most people assume black on white, as in pencil on paper, or black relief ink on paper. Woodcut images can be produced that are essentially reproduced drawings on paper, and my Fourth of July series shows examples of how this idea can be explored.
The first one (October 20, 1993) is essentially a reproduced black line drawing on white paper, or what is sometimes called "black line" technique. The leaves are drawn with simple contour lines and then all the negative spaces were cut out, leaving behind black lines. The inked block reproduces those black lines.

The second one (October 14, 1993) depicts a bowl of rice noodle soup being eaten with the aid of chopsticks. The chopsticks are shown as a black line drawing, as is the hand holding them, and the contours of the bowl. However the noodles are carved out, what could be called "white line" technique. This image shows both black and white line being used in the same piece.

The third print (September 12, 1993) makes reference to a conversation with some fellow art students and depicts a bunch of animals, which I did as carving white lines into a solid black background. The result is essentially a white line contour drawing, the lines carved with small gouges, mostly a v-gouge.

Color in Woodcut

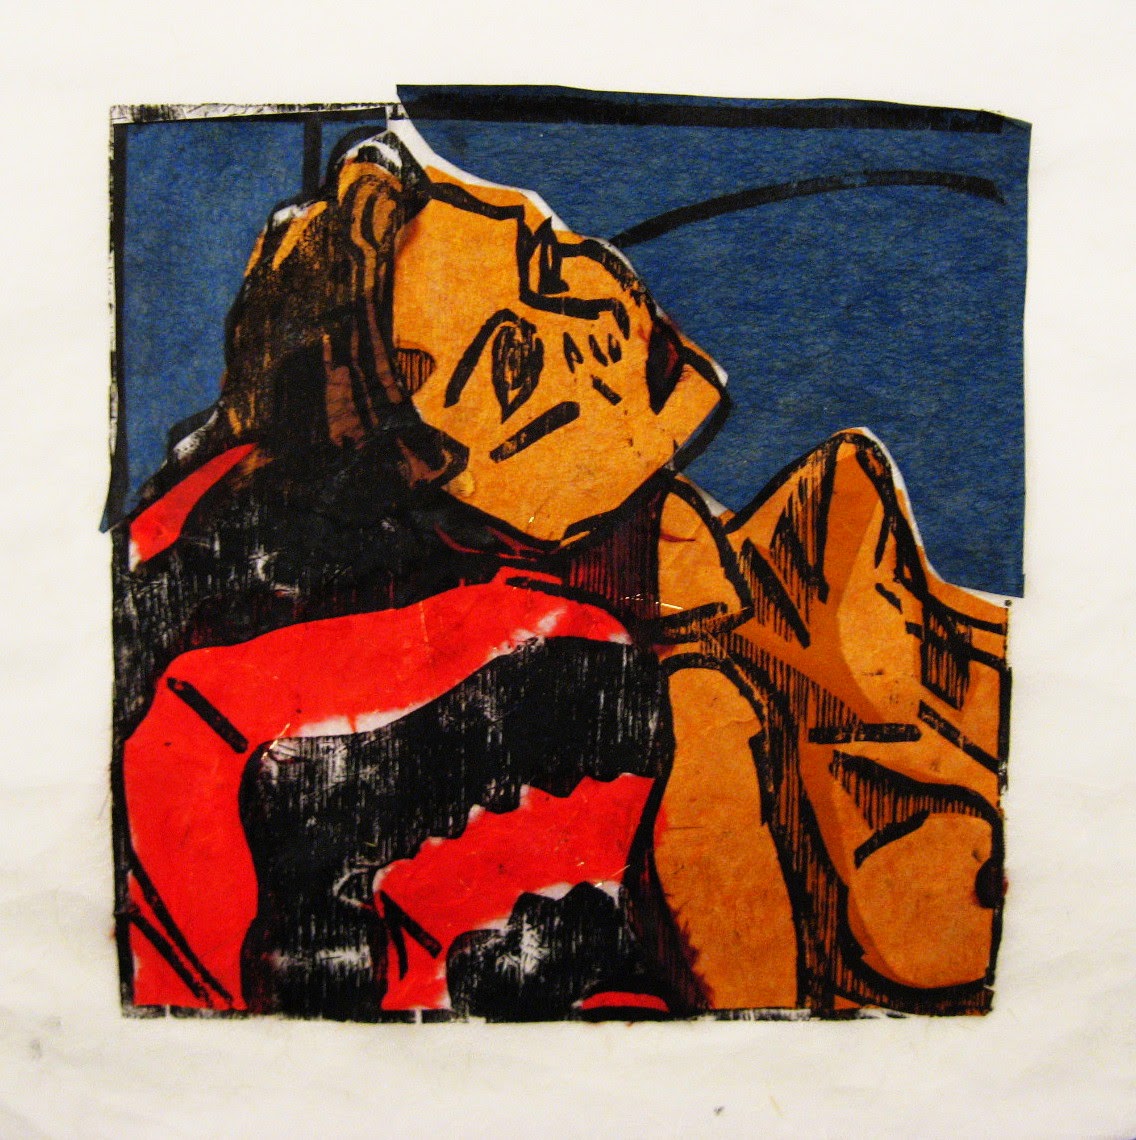
Color can be a useful tool for any artist, and that includes woodcut. Color can be in the form of ink, of paper, or other options. Over the past 20 years, most of my color use has been in the form of hand coloring, the most common approach to color in western prints going back to the renaissance. In those days it was common for print artists to print woodcuts and etchings with black ink, after which the prints would be turned over to other artists to apply color, generally done by painting the printed paper with some kind of pigment. My preference is to use watercolor, which requires a lot of work, but gives me most control over application and creating precise colors. Above is example from my Floating World series. Today I also mentioned that colored paper can be used, and below is an example I did like that. This particular one started with a collage of decorative colored paper, on which an image was printed with black ink from a wood block. Not nearly as precise as the watercolor approach, but a much bolder use of colors.

Pre-cut pieces of colored paper were place on the inked block, the ink helping to hold them in place.


Glue was added to the tops of the cut paper, then a larger piece of print paper on top of everything. Hand printed after that, which transferred the ink to the cut paper and to the large sheet, as well as gluing the small pieces to the large sheet at the same time. Below are the results.
Homework- Spring Break this week and you seem to have a plan for what you will accomplish in that time. I look forward to seeing the results when we return. I do hope to see an early draft of your artist statement for the show soon. Putting words about your work down on paper may help your realize new things about it and what you are trying to do.
For next class 3/17/17- Expecting to see the current block finished and a new one started.