Tuesday, March 29, 2016

3/29/16 3D Design


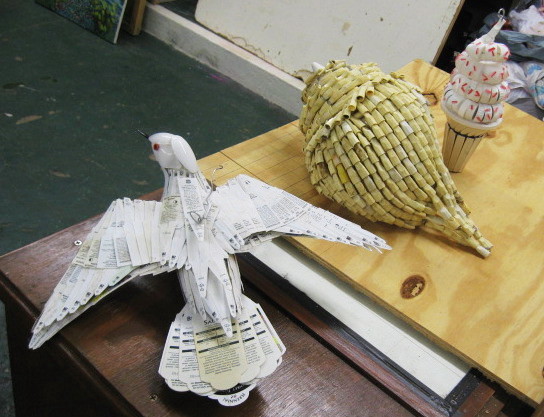
Today's Class- Today we started a new project, though making use of a previously discussed concept- scale and proportions.  Students were asked to create an installation space around one of the proportional figures from earlier this semester.  Installation art is not just making a single three dimensional object, but creating a whole environment, with the whole space functioning as a sculpture.  It can be created around a single object (such as a figure), or it can be just a bunch of stuff that together has some kind of meaning.  I showed slide examples of two well known artists in this medium- Edward Keinholz and George Segal. (if you are unfamiliar with their work, you can probably find them in a general art history textbook, as well as all over the internet)  For the first few years of this project I had students build a piece of the classroom, including some of the furniture, as in the first photo below.  


Last year I opened the assignment up to the possibility of other environments- the main rule being that they should be in a scale relative to one of the figures created as part of the canon of proportions exercise earlier this semester.  Below are some examples from last semester, using one of the figures created earlier.  In keeping with the fine art examples shown in class, found objects can be included now.  


How to make this up- Choose one of your two canon of proportions figures.  Most go with the one in the original proportion, but you may use the exaggerated one if you prefer.  Then decide if you would prefer to go with the classroom option (for which you will use foam core to recreate one of the large work tables, a stool, and one other large item from our woodshop classroom) or come up with some kind of theme for an installation.  You can base such a theme on the original source of the figure, or see if something about the pose suggests something to you.  (in the above piece, the student felt the pose was reminiscent of a surfer, and then built the waves out of bristol board strips and pretzel goldfish. ) You must create a defined space for the installation, which can be a specific floor space, or can be marked out with one or more walls.  (no minimum size for this) You may construct it out of foam core, or use any other materials that you prefer, including found objects that may be suitable to your theme.  You may use paint or other pigments to color the figure or other objects in your installation, just as artists were regularly doing in the 1950's and 1960's examples we saw in class.  For installation style pieces you are not required to create realistic spaces and contents (this is your art), but you will be asked to present and explain your ideas in the critique, so give some serious thought to the space you are designing.  

Homework-  This installation graded project will be due at the beginning of class on April 12, 2016

The manufactured materials (plastics, etc) project is due at the beginning of class on April 5, 2016.  

For next class April 5, 2016- We will begin the second to last project of the semester, using a discarded book as a medium to be carved.  A standard book in the codex format (pages bound in a spine on one edge) is a three dimensional object, but one that can have its dimensions change and then be returned to the original state by opening the book, flipping through the pages, and then closing the book.  The block of pages can be cut and carved as if still the chunk of wood they once were.  You will have two main design options for this project.

A) Single View image- The book is opened to a single point (such as the inside front cover or the middle, to reveal a single three dimensional carved image.  In the portrait image below, the dark marks are not pigment on the page, but deep shadow spaces made from being carved into the block of pages.


B) Changing View Image- What is cut changes regularly, so that as pages are turned, a viewer sees a different combination of spaces being formed in different sections of the book.  In this example, positive and negative shapes change completely several times from the early pages to the later pages, a sculpture that evolves as the viewer moves through the pages of he book.  Bits of the negative shapes later in the book can be seen through the cut shapes of the earlier pages. This example is very geometric, almost like architecture, but more curving, organic shapes could be attempted as well.


You may not draw on or color the pages of your book, but you can take advantage of anything that is printed on them as part of your design.  In these examples, the students created single view images that had a variety of depth and color, which came from revealing bits of different printed pages.


You will be given two weeks of class time, plus some homework time, to produce one book sculpture, so take the time to consider all the possibilities before you begin cutting.  All pages must remain attached to the book by their original binding, and be able to be turned individually.  Glue may be used to repair torn paper, but not to make new constructions. The book must be able to freely open and close.

You will need a book, but having a second one as a back up is a good idea.  I recommend hard cover, 250 to 300 pages.  The subject doesn't matter, as you'll be cutting it up.  Have an x-acto knife and plenty of spare blades, as they will get dull with use, and dull blades are as likely to tear paper as to cut it.  

Tuesday, March 22, 2016

3/22/16 3D Design


Today's Class- Students were a little slow in arriving this morning, but eventually we had enough to start looking at the natural materials projects that were due today.  After that we moved on to starting the next major project, the artificial materials project, or commonly called the plastics project.  While the natural one was building on the origins of human art and the traditions of stone age artists, this new one makes use of materials that are very abundant and available to contemporary artists, cast off manufactured goods.  Things that were manufactured for some other purpose, but we can now use to make representative art.  The first 6 images below are from a fellow Jersey Shore artist, named Lisa Bagwell, who specializes in making art from such things.


plastic utensils, pencils


giant hoagie, with bread made from corks, and filling
that includes plastic cup lids, gloves, disposable razors, etc


 the donut is made from paper cups and plastic utensils

 above and below bird feathers are made from plastic information tags
found in potted plants, plus lots of cigarillo mouth pieces have been
used to a great extent.

How to make this up- Your next graded assignment is to create a representative sculpture using nothing but manufactured items.  This can include any form of plastic, metal, plywood (laminated, not natural grown), synthetics- anything not found in nature.  It must be at least 8 inches in one dimension, and all colors and textures must come from the materials you used to make it.  No particular subject is required, but it must be something we can all recognize.  You may use any material you want to stick stuff together.  Below are some student examples from previous semesters.


Homework- This manufactured materials graded project is due at the beginning of class on April 5, 2016.  All back homework due since early February (starting with the foam core relief project) can still be turned in for partial credit, but with each passing week fewer will be accepted and available points will be less.

The initial due date for the museum paper is April 19th.  Papers will be accepted after this, but with a point deduction.  No papers will be accepted after the end of class on the last day of our last meeting of the semester.

For next class 3/29/16- We are going to go back to a previous assignment, where we dealt with canons of proportions in a pair of figures.  That completed set is a portfolio exercise, and as such is due by the last day of the semester.   However, you will need the original scale version of that figure for next week, so if you haven't gotten that one done yet, you need to complete it by next week.

The project will be to create an installation style sculpture to go around that figure piece.  Installation art is not just a single artwork, but objects and their environment meant to be seen as all one big piece of art.  We will look at some slides next week, including New Jersey native George Segal, and you will have the opportunity to create an environment for your figure.  Two main options:

A. Classroom Installation


For the first few years I taught this class the project was to build pieces of the classroom to the same scale as your figure, using foam core.  This includes one large work table, one stool, plus one other big items from our classroom, as in the student examples above and below.


Alternative Installation

In this other option, you will create a complete environment for your figure, using the same scale as your figure.  The subject may relate to the original photo you had worked from, or be a completely new concept of your own.  You can stick with foam core construction, but because found objects are often part of contemporary installation art, you may also use found objects in this option.  These student example include a photography studio, a living room, and a surfer amidst waves complete with pretzel goldfish.


Bring your completed figure, foam core or other materials for construction of your installation (a defined space, such as a section of floor, is necessary), scissors or a knife, and glue.

Tuesday, March 15, 2016

3/15/16 3D Design


Today's Class-  Back from Spring Break, and easing into the second half of the semester.  Today we worked on a portfolio exercise, one making use of pulp cardboard coffee trays that one can usually get for free wherever coffee is sold to go.  I opened by showing a few slides of architecture that makes use of some of the same kinds of shapes found in the cardboard (mostly Spanish architect Gaudi), and we also took some time to go down to the gallery to see the student art show.

How to make this up- Get at least two cardboard 4 cup coffee trays, and spend a few minutes looking at both top and bottom sides, seeing if (like the shells we started with last time) any familiar objects are suggested by the complex shapes in the trays.  Then when you are ready, start cutting up the cardboard and gluing it together to make sculptures.  No specific subject required, can be representational or abstract, by do try to make specific use of the shapes found in the cardboard.  Below are some student examples from previous semesters.

This is a portfolio exercise that can be made up any time before the end of the semester for full credit.


Homework- Nothing new, but the cave art style natural materials project is due at the beginning of class on March 22, 2016.  Previous graded projects can still be turned in for partial credit, though the amount decreases with each additional week late.  

I received the first museum assignment today.  The official due date is April 19, 2016, and any reasonably complete paper turned in by then can be resubmitted for a better grade by the end of the semester, but completing this assignment sooner means you don't have to deal with it at the end of the semester. 

For next class 3/22/16- We will begin the next graded project, what I generally refer to as the plastic project.  Similar to the natural materials project, except that now all the materials must be discarded man made materials.  The subject can be anything, but the piece should be representational.  Colors and textures should come from the materials used, not from painting.  The materials should be discarded objects designed for other purposes, not items designed for people to build with (like Lego bricks or Erector set parts)  Pieces can be held together any way you want.  Below are some examples of this style of sculpture.  The first five are from a professional artist from my area who specializes in this kind of thing, the rest are from students in previous semesters.  Bring whatever materials you wish to use to make what you plan, or just bring a whole lot of garbage and figure it out in class.


 Hoagies from Lisa Bagwell using corks, plastic bottle caps, gloves, plastic lids, disposable razors, etc.

plant care tags, small cigar tips, etc


student projects


Friday, March 4, 2016

Student Art Show


If you haven't seen it yet, the current Fine Arts Student Exhibition is up in the Howe Gallery, the main one on the first floor, down the hall from our classroom.  The gallery is open when it's open, and it's not always open on Tuesdays, but it will be open for the reception on Monday, March 21st, from 4 to 6 pm.  Don't know for sure what is planned, but typically there will be some refreshments out in the hallway.  Expect a good crowd of the student artists, perhaps some of the professors (I don't have to be at Kean that day so I'll be skipping the event), and if there is a piece or process you are particularly interested in, it may be an opportunity to learn more about it.  If there is a day when the doors are open and we can take a break from what we are working on, I will take the class on a brief trip to see and discuss the show.  It's mostly flat work, so not much that applies to our class, but at least one of our current students is represented with something else. In any case, if you are a Fine Art student, you should see what your fellow students are up to and start getting in the habit of exhibiting your own work.

And speaking of visiting art shows, we are now nearing the halfway point of the semester, so it's a good time to remind you that if you haven't made your museum visit yet, consider going soon.

Tuesday, March 1, 2016

3/1/16 3D Design


Today's Class- A nicer day today than last week, so we were able to go ahead with the natural materials/stone age art project.  I showed examples of art from the cave era, the focus on 3D art.  We did a quick exercise, looking at shells I collected from beaches in my area, and seeing if the shapes if inspired any ideas, as many sculptural pieces of that time seem to be influenced by the size and shape of the material- rocks worn in water, bones and tusks, etc.  Then students started on the project, creating a three dimensional artwork using nothing but natural materials, the kinds of things that would have been available to artists 20,000 years ago.  

How to make this up- 


The project is to create a sculpture relating to that ancient period, so the subject will be figural, such as a person, animal, mythological/ hybrid,  and the materials need to be from natural sources, things like sea shells, rocks and stones, solid wood, plant products (bark, twigs, leaves, flowers, berries, seeds, etc), earthen clays, natural fibers, but NO plywood or concrete, and certainly no plastics.  Hot glue may be used to attach parts, and because the ancient artists often used color, you may use paint on your pieces.  It should be at least 6" in length, and if your subject is small, you may give it an environment to meet that minimum size.  Above is a life size human made from seashells and cement that was in an art show in Belmar last year, much bigger than what you need to do.  Below are student examples from previous semesters.


bird (wood scraps and shells) 

 bull (wood scraps and shells)


 mermaid (shells, stones, leaves)

 owls (shells, twigs)


 peacock (stone, sticks, flowers, evergreen needles)


spider (seeds, spiky seed pods)

Homework- Normally I give two weeks for this stone age natural materials project to be completed, but we have our spring break next week, so the due date will be March 22, 2016.  Those who have not yet submitted the Make 50 module project and/or the foam core Relief panels (skeleton) project should turn them in as soon as possible to receive partial credit.  

We are at about the halfway point in the semester, so if you aren't planning to withdraw, make sure you are caught up as soon as you can.  

***Spring Break March 7 to March 12, 2016.  No Classes that week***

For next class March 15, 2016- We will be doing a portfolio assignment related to complex shapes.  The medium will be pulp cardboard coffee trays, the four cup holders that are commonly given away wherever coffee is sold to go.  You will need at least two, but a third would be good.  Besides those, bring scissors or a knife for cutting and some kind of glue.