Wednesday, October 27, 2010

10/27/10 Intro to Art

Today's Class- The topic for today was rhythm as a visual element. I showed slides of art from the Renaissance to the present that displayed a variety of rhythmic qualities. Then I played various types of instrumental music, while the students made abstract watercolor paintings based on the music being listened to, such as in the example above. In addition, we reviewed the results of the research papers, with each student reporting on some of what they learned about their art historical period, and the graded papers were returned.

How to make this up- Full details as to how to complete today's assignment, along with several more student examples, can be found here. It lists 5 types of music, out of which your should pick 4 to do for yourself. This is a portfolio exercise, so must be made up by the end of the semester to receive full credit.

Homework- The photography assignment given last week is due at the beginning of class next week, November 3, 2010. Have prints labeled and in order. Those who still owe me a research paper should turn it in as soon as possible to receive some partial credit for the assignment.

For next class 11/3/10- We will begin a printmaking related project, something called a collagraph. I will have materials for everyone to use, but students are encouraged to bring in a variety of natural and manufactured items with interesting textures, stuff that you don't mind cutting up and gluing to a surface. Also bring scissors and glue (something stronger than a glue stick). You don't need your 18" x 24" pad for next week.

Monday, October 25, 2010

2D Design Final Charcoal and Woodcut Preview


Final Charcoal Drawing

How to make this up- For the charcoal drawing, set up a still life. Put a box on a table, drape with both a white or light colored cloth and a dark colored cloth, then arrange 4 objects (2 white, 2 colored) on and around the box. Shine a direct light on the set up to create patterns of light and shadow. Draw on a sheet of 18"x 24" paper, paying attention to shapes, sizes, and spacing of the objects, as well as the value of individual objects and drapery. Above are a student examples. Spend up to 4 hours on it, using your choice of compressed or vine charcoal. This is a graded project, so the more weeks it is late, the more points will be deducted.

Woodcut Project


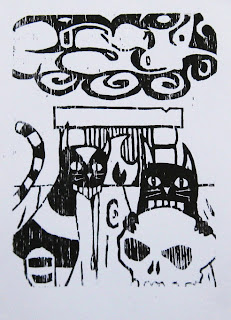
The next graded project will be a book illustration in the form of a woodcut print. Today students were shown examples of prints from history, and examples of this project from previous students (see above and below). Each student needs to choose a book for which they will create an illustration. It can be fiction (novel, short story), non-fiction (history, biography), poetry, but no fairy tales, children's stories, young adult books, comic books, or other fully illustrated writing. The illustration can be of a specific scene from your book, or something that sums up the entire book. Your resulting image must be representational, but doesn't have to be realistic, as the examples demonstrate. The project will be graded based on how well it portrays the narrative from the book and for creating an interesting composition in black and white. Wood will be distributed to the class next week, and after a discussion of two dimensional composition, the rest of the class meeting will be devoted to working on your block.


Wednesday, October 20, 2010

10/20/10 Intro to Art

Today's Class- Today I collected the research papers from everyone who had one. They will be graded and returned next week. Today's art topic was the medium of photography. I showed slides from the early history of photography through the present, breaking them down by chronology and common themes. After the slides, I distributed and reviewed a take home photography assignment. We took a break, then used the rest of the class to tour the various art studios in Vaughn Eames and visited an exhibition across campus.

How to make this up- The photo assignment was distributed on a handout, but if you weren't there today or misplace your copy, the full assignment, along with some student examples, can be found here.

Homework- The take home photo assignment is due at the beginning of class on November 3, 2010. The photos must be printed out and individually labeled, but don't have to be mounted.

If you haven't yet turned in your research paper, bring it to class as soon as possible.

For next class 10/27/10- We will use the paints again, so bring your 18" x 24" pad, watercolor paints, brushes, palette, and water container.

Monday, October 18, 2010

2D Design Charcoal Exercises


How to make this up- Put a box on a table, and drape with a white or light colored cloth (sheet, towel, etc). Find 4 white or light colored objects of similar size. Arrange with one on the box and the others around it on the table. Shine a directional light on it to create strong light and shadow patterns. Do your best to match the light and shadow in the still life, while still paying attention to the shapes of individual objects, and the proportions and spacing of the objects. Remember that when doing value drawings, you want to eliminate as many lines as possible from the final drawing, having edges of value shapes instead. Then do the following drawings:


Value Reduction Drawing- Take a sheet of your 18" x 24" paper, and use your vine charcoal to fill the page with an even dark gray tone. Then use your kneaded eraser to draw from the set up (see the example above), erasing out the light tones that you see in the set up. If you erase too much, fill it back in with your vine charcoal. If you have spray fixative, you should use it to permanently fix the charcoal to the page once the drawing is finished. Students in class spent about an hour on the drawing.

Compressed Charcoal Drawing- Replace two of the white objects in your still life with dark colored objects of similar size. Take a new sheet of 18" x 24" paper. Use your compressed charcoal to draw the still life on white paper, as in the above student example. (do not fill in the page with compressed charcoal first, as it is very difficult to erase) Students in class spent about 90 minutes on the drawing.

Both of these are portfolio exercises that must be made up by the end of the semester to get credit, but it is strongly recommended that you do it in the next week for practice, because next week we'll be doing a charcoal graded project.

Wednesday, October 13, 2010

Intro to Art Color Theory Exercises


How to make this up- There are two parts to today's assignment.

Color Wheel On a sheet of your paper, use pencil to draw a large circle toward one end of the paper, leaving a few inches margin between the circle and the edge of the paper. Then do the following:

Primary colors- Draw 3 boxes along the rim of the circle, half inside the circle, half outside, equally spaced around the circle. Inside the boxes you'll paint the three primary colors- Red, Yellow, and Blue, one in each. Put the full strength color in the part of the box outside the circle, the color plus white on the inside. (in the above example, red is at 3:00, blue is at 7:00 and yellow is at 11:00)

Secondary colors- Draw 3 more boxes, equally spaced between the primary boxes. These will be for the secondary colors, equal mixes of the three primaries. Mix them using the same 3 shades you used for the first part, and as with the first part, use the full strength mix outside the circle, and the color plus white inside. Your secondaries should appear to be halfway between the source colors, not closer to either one. Make sure that the secondary colors are located between the primary colors used to make them. (in the above example, orange is at 1:00, violet is at 5:00, and green is at 9:00)

Intermediate colors- Draw 6 more boxes, spaced equally between the previous 6. These boxes can be smaller. Mix the tertiary colors, halfway between each primary and the adjacent secondaries. (red-orange, red-violet, blue-green, etc) You don't need to do the mixes with white this time, just the 6 colors. Like with the secondaries, try to mix colors halfway between the two, not closer to one or the other.

Complement Mix Every color around the color wheel has a complement, it's exact opposite, which is located directly across the wheel from it. Choose either red/green or blue/orange. In the remaining part of your paper, draw a row of 5 boxes, with 3 adjacent boxes centered beneath it. Put the full strength primary color in your pair (red in the above example) at one end of the row of 5, and the full strength secondary (green above) at the other end. In the third box mix an equal combination of the primary and secondary so that it doesn't look closer to either original color. Add white to it and put in the box directly below it. In the remaining boxes mix colors that have both complements, but more of the one that the box is closest to, and again add white and put that color in the box below. (in the above example, from left to right, green, green with a little red, equal amounts of green and red, red with a little green, and all red)


If all these directions are a little complicated, talk to me in class next week. This is a portfolio exercise, so you have until the end of the semester to finish it.


Wednesday, October 6, 2010

10/6/10 Intro to Art

Today's Class- Today we looked at slides of monumental 2D art- artworks that cover large walls, ceilings, and occasionally floors- mostly paintings and mosaics. The class also viewed a video showing all the steps in the creation of a 400 square foot mural. After that, students began a new portfolio exercise, a mosaic inspired collage. While students were working, I spoke with them individually regarding their research papers.

How to make this up- The mosaic collage project, an example of which can be seen above, is a portfolio exercise that must be made up by the end of the semester. Full details as to how to complete the piece, as well as additional examples, can be found here.

Homework- Those who have not yet shown me a list of intended artists and artworks and a book source for their research papers should do so as soon as possible, in class or by e-mail. If you do not clear your choices with me, you will be responsible if they are not appropriate to your topic. The paper itself is due at the beginning of class on October 20, 2010.

For next class 10/13/10- We will begin our study of color. Bring all your painting related supplies- watercolor paints, brushes, mixing palette, and some kind of container for water (cup, can, empty bottle, etc), as well as your 18" x 24" pad, pencil and eraser.

Monday, October 4, 2010

10/4/10 2D Design

Today's Class- Today we started with a critique of the stipple drawings, which were later graded and returned. After that we started a new graded project, our final line drawing project of the semester, a complex still life, similar to the one shown above.

How to make this up- Everyone came to class today, so no one needs to make it up.

Homework- Nothing new, but if you haven't yet turned in your dot drawing, bring the drawing and the original photo to the the next class meeting.

For next class 10/18/10- We will begin our study of value. Bring your 18" x 24" pad, vine and compressed charcoal, kneaded eraser, and spray fixative.